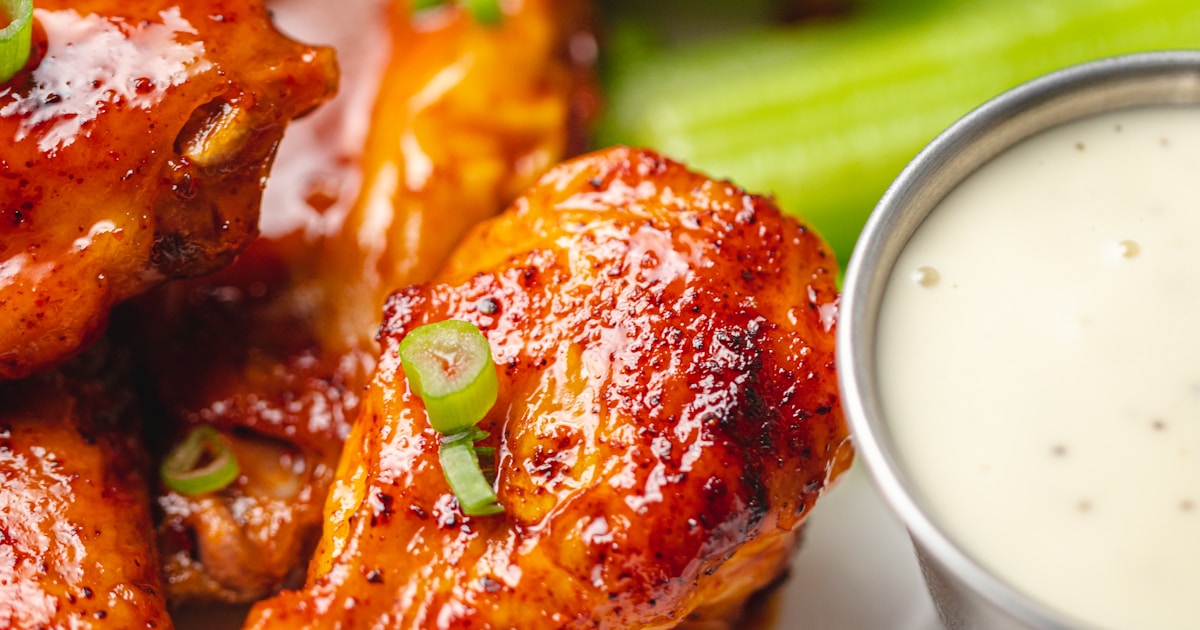
There is a moment, about fourteen minutes into cooking chicken wings in an air fryer, when the kitchen starts to smell like the best restaurant you have ever been to. The skin is tightening. The fat is rendering. And you realize that everything you thought you knew about making crispy wings at home was wrong. This is that recipe.
Why Air Fryer Chicken Wings Are Better Than Deep Fried
Deep frying chicken wings produces incredible results. Nobody is arguing that. But it also produces a kitchen covered in grease, a pot of used oil you have to deal with, and that lingering smell that stays in your curtains for days. The air fryer eliminates all of that while delivering wings that are genuinely, honestly, no-exaggeration just as crispy.
The secret is circulating hot air. An air fryer works by blasting superheated air around the food at high speed, creating a convection effect that crisps the exterior while keeping the interior moist. When you combine that with one specific pantry ingredient — baking powder — you get a chemical reaction on the skin that produces a crunch so loud your family will hear it from the other room.
And the best part: the total cook time is under 25 minutes. From raw wings to golden, shattering-crispy perfection in less time than it takes to preheat a conventional oven.
What You Will Need
This recipe uses simple ingredients that you almost certainly already have in your kitchen. Nothing exotic, nothing you need to order online, nothing that requires a trip to a specialty store.
The Wings:
1 kilogram of chicken wings (about 2.2 pounds), separated into drumettes and flats. You can buy them pre-separated or do it yourself with kitchen shears. Pat them completely dry with paper towels — this step is non-negotiable. Moisture is the enemy of crispiness. Take a full minute to dry each piece thoroughly.
The Seasoning:
1 tablespoon of olive oil (just enough to help the seasoning stick), 1 teaspoon of fine salt, 1 teaspoon of freshly ground black pepper, 1 teaspoon of garlic powder (not garlic salt — powder), 1 teaspoon of smoked paprika (smoked adds depth, but sweet paprika works too), and the secret weapon: half a teaspoon of baking powder. Not baking soda. Baking powder. This is the single most important ingredient in the entire recipe.
Why Baking Powder Changes Everything
Baking powder is alkaline. When it meets the moisture on the surface of the chicken skin and is exposed to heat, it raises the pH of the skin, which breaks down the proteins more efficiently and allows the fat to render faster. The result is skin that becomes thin, dry, and incredibly brittle — the kind of crispy that shatters when you bite into it.
This is not a hack. This is food science. Serious restaurants have been using this technique for years. Half a teaspoon per kilogram of wings is the perfect ratio — enough to create the reaction without leaving any metallic aftertaste.
Step-by-Step Instructions
Step 1: Dry the Wings (Do Not Skip This)
Take every single wing piece and pat it dry with paper towels. Then put them on a plate lined with fresh paper towels and let them sit for five minutes. Then pat them dry again. The drier the skin, the crispier the result. If you have time, leave them uncovered in the refrigerator for an hour before cooking. The cold dry air of the fridge draws out even more surface moisture.
Step 2: Season Generously
Put the dried wings in a large bowl. Drizzle with olive oil and toss to coat lightly. In a small bowl, mix the salt, black pepper, garlic powder, paprika, and baking powder together. Sprinkle the seasoning mixture over the wings and toss until every piece is evenly coated. Use your hands — it is more effective than a spoon. Make sure the seasoning gets into every fold and crevice.
Step 3: Preheat the Air Fryer
Set your air fryer to 180 degrees Celsius (356 degrees Fahrenheit) and let it run empty for 3 to 5 minutes. Preheating matters. When the wings hit an already-hot basket, the skin starts crisping immediately instead of slowly warming up in a cold environment. This is the difference between good wings and great wings.
Step 4: First Cook — Low and Slow
Arrange the wings in the air fryer basket in a single layer. Do not stack them. Do not crowd them. Air needs to circulate around every piece — that is literally how the machine works. If you have more wings than fit in one layer, cook them in batches. Crowding the basket will give you steamed, soggy wings instead of crispy ones.
Cook at 180 degrees Celsius for 12 minutes. During this phase, the fat under the skin is rendering out and the interior is cooking through. Resist the urge to open the basket and check on them.
Step 5: Flip and Blast
After 12 minutes, open the basket and flip every wing using tongs. Then increase the temperature to 200 degrees Celsius (392 degrees Fahrenheit). Cook for another 8 to 10 minutes. This high-heat blast at the end is what creates the deep golden color and that audible crunch. The skin will look almost too dark — it is not. It is perfect.
Step 6: Rest and Serve
Remove the wings from the basket and place them on a wire rack — not a plate. A plate traps steam underneath and softens the bottom. A wire rack keeps air circulating, maintaining crispiness on all sides. Let them rest for two minutes. This allows the juices to redistribute so they do not all run out when you bite in.
Pro Tips That Make the Difference
Always dry your chicken before cooking. This is the single most common mistake people make. Wet skin equals soggy wings. Every professional chef will tell you the same thing. Paper towels are your best friend here.
Never stack wings in the basket. It is tempting when you are cooking for a group, but stacking defeats the entire purpose of the air fryer. The hot air cannot reach the skin when pieces are piled on top of each other. Cook in batches if you need to — the results are worth the extra ten minutes.
Baking powder is non-negotiable. If you skip the baking powder, you will get good wings. If you use it, you will get extraordinary wings. The difference is dramatic and immediately obvious. Make sure it is baking powder, not baking soda — baking soda will leave a bitter, soapy taste.
Do not skip the flip. The bottom of the wings sits against the basket during the first cook. Flipping ensures both sides get direct exposure to the circulating hot air. One flip at the halfway point is all you need.
Invest in a meat thermometer. The internal temperature of the thickest part should reach 74 degrees Celsius (165 degrees Fahrenheit). Chicken wings are forgiving because of their high fat content, but a thermometer removes all guesswork.
Flavor Variations
Honey Garlic Wings: After cooking, toss the wings in a sauce made from 3 tablespoons of honey, 2 tablespoons of soy sauce, 1 tablespoon of minced garlic, and a squeeze of lime juice. The sauce clings to the crispy skin beautifully.
Spicy Buffalo Wings: Melt 3 tablespoons of butter and mix with your favorite hot sauce in a 1:1 ratio. Toss the cooked wings immediately and serve with blue cheese dressing and celery sticks. Classic for a reason.
Garlic Parmesan Wings: Toss hot wings in melted butter, then coat with a mixture of finely grated Parmesan cheese, garlic powder, and chopped fresh parsley. The Parmesan melts slightly against the hot skin and creates an addictive savory crust.
Lemon Pepper Wings: Toss in melted butter with generous amounts of cracked black pepper and fresh lemon zest. Squeeze half a lemon over the top right before serving. Light, bright, and impossibly good.
Asian Sticky Wings: Combine 2 tablespoons of soy sauce, 1 tablespoon of rice vinegar, 1 tablespoon of sesame oil, honey, and a teaspoon of grated fresh ginger. Toss and garnish with sesame seeds and sliced green onion.
Common Mistakes and How to Avoid Them
Mistake: Wings come out rubbery. This almost always means too much moisture on the skin before cooking. Dry them more aggressively next time, and consider the refrigerator method for extra-dry skin.
Mistake: Wings are cooked but not crispy. The basket was probably overcrowded. Air fryers need space to circulate air. One layer only, with small gaps between each piece.
Mistake: Seasoning falls off during cooking. The olive oil was either skipped or not mixed thoroughly enough. Oil acts as the adhesive between the skin and the spices. Toss well.
Mistake: Wings are crispy but dry inside. Overcooked. Check the internal temperature — pull them at 74 degrees Celsius. The resting period after cooking allows the juices to redistribute back into the meat.
Frequently Asked Questions
Can I use frozen wings?
Yes, but you need to thaw them first and dry them extremely well. Frozen wings carry a lot of extra moisture. Thaw them in the refrigerator overnight, then pat dry thoroughly before seasoning. Add 5 to 7 extra minutes of cooking time and check the internal temperature before serving.
What size air fryer do I need?
A 4 to 5 liter air fryer can comfortably cook about 500 grams (1 pound) of wings in a single layer. For a full kilogram, you will need either a larger 8-liter model or plan to cook in two batches.
Can I use this method for drumsticks or thighs?
Absolutely. The baking powder technique works on any skin-on chicken piece. Drumsticks will need about 22 to 25 minutes total, and thighs about 25 to 28 minutes, using the same two-temperature method.
Do I need to spray the basket with oil?
If your air fryer basket is non-stick and in good condition, no. The olive oil on the wings provides enough fat to prevent sticking. If you have an older basket or a stainless steel model, a light spray of cooking oil on the basket will help.
How do I reheat leftover wings?
Air fryer again, 180 degrees Celsius for 4 to 5 minutes. They will re-crisp almost as well as fresh. Do not microwave them — the microwave will turn the crispy skin into rubber.
Final Thoughts
Once you make chicken wings in the air fryer using this exact method — dried skin, baking powder, two-temperature cook — you will not go back to deep frying. You will not go back to oven baking. You will not go back to anything else.
The cleanup takes thirty seconds. The cook time is under twenty-five minutes. The results are restaurant quality. And the crunch is so loud it is almost embarrassing.
Make them once. You will make them every week after that.