There are meals you make because they are impressive, and there are meals you make because it is a Tuesday night, you are tired, the fridge has half a chicken breast and some vegetables that need to be used before they go bad, and you need something real on the table in under half an hour. This is the second kind of meal. And it might be better than the first.
Why This Is the Only Weeknight Dinner You Need
Most healthy dinner recipes lie to you about how long they take. They say twenty minutes but forget to mention the prep, the preheating, the cleanup, and the fifteen minutes you spend staring at the recipe trying to figure out what you were supposed to have done first. This recipe actually takes twenty minutes. Ten minutes of cutting things up, ten to twelve minutes of the air fryer doing all the work while you set the table or scroll your phone or do absolutely nothing.
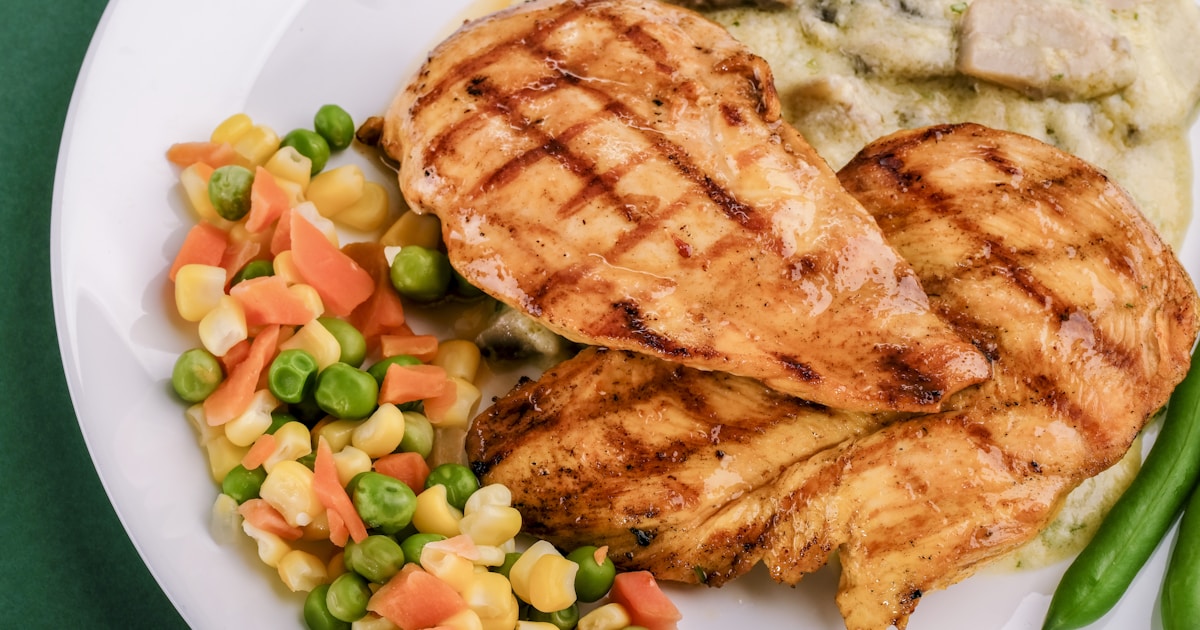
The result is not a sad healthy dinner. It is not steamed chicken and soggy vegetables that you eat out of obligation. The chicken cubes come out with a golden-brown seared exterior and a juicy, tender interior. The broccoli florets get charred crispy edges that taste almost smoky. The red bell pepper chunks soften and caramelize. And the sliced garlic turns into these incredible little roasted chips that shatter when you bite them.
It is one basket, one protein, two vegetables, and zero excuses not to eat well on a busy night.
What Makes the Air Fryer Perfect for This
Cooking chicken and vegetables together in a conventional oven takes 25 to 35 minutes at the minimum, and the chicken usually finishes before the vegetables or vice versa. On a stovetop, you need to cook them separately — sear the chicken first, set it aside, cook the vegetables, then combine. That creates two pans to wash and requires your attention for the entire cook time.
The air fryer solves both problems. The circulating hot air at 200 degrees Celsius cooks the chicken and vegetables simultaneously and at the same speed because the pieces are cut to the same size. The basket lets moisture escape downward instead of trapping it as steam, which means the chicken sears rather than steams. And the high convection heat chars the broccoli edges in a way that a regular oven cannot achieve without broiling.
You load everything in one basket, push one button, shake it once at the halfway point, and walk away. That is the entire cooking process.
The Science of Cooking Chicken and Vegetables Together
The reason most people fail at cooking protein and vegetables together is that they ignore the most important variable: piece size. Chicken is denser than broccoli and bell pepper. If you put a thick chicken breast next to a broccoli floret, the broccoli will burn before the chicken is cooked through.
The solution is simple: cut the chicken into bite-sized cubes — roughly one inch. At this size, the chicken cooks through in 10 to 12 minutes at 200 degrees Celsius, which is exactly how long it takes for broccoli florets to char and bell pepper chunks to soften. By making everything the same size, you synchronize their cook times perfectly.
The olive oil serves a dual purpose. On the chicken, it promotes the Maillard reaction — the chemical process that creates that golden-brown crust. On the vegetables, it helps conduct heat to the surface and creates those beautiful charred spots on the broccoli. One tablespoon is enough. More than that will pool in the bottom of the basket and create smoke.
Ingredients — Everything You Need
The Chicken:
1 large chicken breast, cut into bite-sized cubes — roughly one inch per side. Use a sharp knife and a stable cutting board. The cubes should be as uniform as possible so they all finish cooking at the same time. If your chicken breast is very thick, butterfly it first (slice it horizontally in half) before cubing. This is about 200 to 250 grams of chicken, which is the right amount for one generous serving or two lighter servings.
Pat the chicken cubes dry with paper towels after cutting. This step takes thirty seconds and makes a noticeable difference in how well the exterior browns. Wet chicken steams. Dry chicken sears.
The Vegetables:
1 cup of broccoli florets — cut them to roughly the same size as the chicken cubes. If you buy a whole head of broccoli, cut the florets with about half an inch of stem attached. The stem adds a nice crunch and holds up well in the air fryer. Do not use the thick central stalk for this recipe — it takes longer to cook and will be underdone when the florets are perfect.
Half a large red bell pepper, chopped into chunks about the same size as everything else. Red bell pepper is preferred over green because it is sweeter and caramelizes more beautifully in the air fryer. The sugars in red pepper start to brown at high heat, creating a slightly smoky sweetness that complements the savory chicken perfectly. Orange or yellow peppers work just as well. Green is fine but less sweet.
2 to 3 cloves of garlic, thinly sliced — not minced, not pressed, sliced. Thin garlic slices roast into crispy little chips in the air fryer. They get golden and nutty and slightly sweet. Minced garlic would burn at this temperature. Whole cloves would not cook through. Thin slices are the sweet spot — about two millimeters thick.
The Seasoning:
1 tablespoon of olive oil — extra virgin works fine, but regular olive oil or avocado oil are also good options. The oil needs to coat everything lightly, not drench it. One tablespoon is the right amount for this quantity of food.
Half a teaspoon of salt. Start here and adjust after tasting. The salt does more than add flavor — it draws a small amount of moisture to the surface of the chicken during the first moments of cooking, which then evaporates quickly and concentrates the savory flavor in the crust.
A quarter teaspoon of black pepper, freshly ground if possible. Pre-ground pepper works but has less punch. The pepper adds a subtle heat that builds in the background without overpowering anything.
Optional additions: A pinch of red pepper flakes adds a gentle kick of heat that plays beautifully against the sweet bell pepper. A quarter teaspoon of garlic powder reinforces the garlic flavor throughout the dish rather than just where the garlic slices land. Half a teaspoon of smoked paprika gives the chicken a deeper reddish color and a faint smokiness. A squeeze of lemon juice right before serving brightens everything up.
Step-by-Step Instructions
Step 1: Prep Everything First
Before you touch the air fryer, get everything cut and ready. This is a fast recipe and you do not want to be chopping bell peppers while the chicken is already cooking. Cut the chicken breast into uniform one-inch cubes. Cut the broccoli into florets roughly the same size. Chop the bell pepper into chunks. Slice the garlic thinly. Arrange everything on your cutting board or in a large bowl. The total prep time is about ten minutes, and once it is done, the rest is hands-off.
Step 2: Load the Air Fryer Basket
Add the cubed chicken, broccoli florets, chopped bell pepper, and sliced garlic directly into the air fryer basket. Do not put them in a separate pan or on a tray inside the basket — the food needs direct contact with the circulating air and direct proximity to the heating element. The basket perforations allow hot air to reach the bottom of the food, which is how the air fryer achieves oven-like results in half the time.
It is fine if the ingredients overlap slightly, but try not to pack them too tightly. A single loose layer with some pieces resting on others is ideal. If your air fryer is small (under 3.5 liters), cook in two batches rather than cramming everything in. Overcrowding traps steam and prevents browning.
Step 3: Season in the Basket
Drizzle the tablespoon of olive oil over everything in the basket. Then sprinkle the salt and black pepper evenly over the top. This method — seasoning directly in the basket — saves you a mixing bowl and works just as well as tossing in a separate bowl first, provided you toss everything together in the next step.
Step 4: Toss to Coat
Using a wooden spatula, silicone tongs, or just your hands if the basket is cool, gently toss everything together until the chicken and vegetables are lightly and evenly coated in the oil and seasoning. Every piece should have a thin sheen of oil and visible specks of pepper and salt. The garlic slices will distribute themselves naturally — do not worry about placing them precisely.
Spend about thirty seconds on this step. The goal is even coating, not perfection. Once everything has a light gleam of oil, you are ready to cook.
Step 5: Cook
Slide the basket into the air fryer. Set the temperature to 200 degrees Celsius (400 degrees Fahrenheit). Set the timer for 10 to 12 minutes. Close the basket and walk away. The air fryer will do all the work from here.
During the first five minutes, the chicken surface is drying out and beginning to brown. The broccoli is starting to char at the tips. The bell pepper is softening and its sugars are beginning to caramelize. The garlic slices are turning golden.
Step 6: Shake at the Halfway Point
At the 5 or 6 minute mark, pull the basket out and give it a firm shake — side to side, two or three times. This redistributes the food so that pieces that were on top drop to the bottom and vice versa. It ensures that every surface gets exposure to the hot circulating air and prevents any single piece from charring too much while its neighbor stays pale.
If you see pieces stuck to the basket, use a spatula to gently release them before shaking. Do not stab at the chicken with tongs — you will tear the developing crust. A shake is gentler and more effective.
Slide the basket back in and let it finish cooking for the remaining 5 to 6 minutes.
Step 7: Check and Serve
The meal is done when the chicken cubes are golden-brown on the outside and the internal temperature reads 74 degrees Celsius (165 degrees Fahrenheit) on a meat thermometer. If you do not have a thermometer, cut one cube in half — the interior should be white throughout with no pink remaining. The juices should run clear.
The broccoli should have charred, crispy edges — dark brown to black on the tips with bright green still visible on the body. This is not burned. This is caramelized broccoli, and it tastes incredible.
The bell pepper should be soft, slightly collapsed, and beginning to caramelize at the edges. The garlic slices should be golden-brown and crispy — they will be fragrant and sweet rather than sharp.
Plate everything immediately and serve hot. Do not let it sit in the basket — residual steam will soften the crispy edges.
How to Make It Even Better
Add a sauce after cooking. A drizzle of soy sauce and honey mixed together (one tablespoon each) tossed with the hot chicken and vegetables creates a sticky glaze that elevates this from a simple weeknight dinner to something you would be proud to serve to guests. A squeeze of sriracha mixed with lime juice is another excellent option for an Asian-inspired kick.
Finish with acid. A squeeze of fresh lemon juice over the finished plate brightens every flavor and cuts through the richness of the olive oil. It sounds small but the difference is dramatic. Lime juice works just as well if that is what you have.
Add fresh herbs at the end. A scatter of chopped fresh parsley, cilantro, or basil right before serving adds a burst of color and a fresh flavor that contrasts beautifully with the roasted ingredients. Do not add herbs before cooking — they will burn and turn bitter at 200 degrees.
Top with something crunchy. A sprinkle of toasted sesame seeds, crushed peanuts, or even crumbled feta cheese adds texture contrast. The soft interior of the chicken, the charred crispiness of the broccoli, and the crunch of the topping create a three-texture bite that is deeply satisfying.
Make it spicy. If you like heat, add a quarter teaspoon of cayenne pepper to the seasoning, or toss the finished dish with chili crisp oil. Fresh sliced chili on top works too — the raw heat against the cooked ingredients creates an exciting temperature and flavor contrast.
Meal Prep and Scaling
This recipe scales easily. For two full servings, use two chicken breasts, double the vegetables, and increase the oil to two tablespoons. You will need to cook in two batches unless you have a large air fryer (6 liters or more). Keep the first batch warm on a plate loosely covered with foil while the second batch cooks.
For meal prep, cook a double or triple batch and store in airtight containers in the refrigerator for up to four days. Reheat in the air fryer at 180 degrees Celsius for 3 to 4 minutes — it re-crisps beautifully. Do not microwave unless you accept that the crispy edges will become soft. The microwave is convenient but it destroys the texture that makes this recipe special.
This works over rice, quinoa, couscous, or pasta. It works in a wrap with hummus and lettuce. It works on its own as a high-protein, low-carb meal. The versatility is part of what makes it a permanent addition to the weekly rotation.
Vegetable Variations
Swap the broccoli for: Cauliflower florets (same cook time), asparagus spears cut into thirds (reduce cook time by 2 minutes), green beans (same cook time), or Brussels sprouts halved (add 2 minutes). Each produces a slightly different flavor but the method stays identical.
Swap the bell pepper for: Zucchini half-moons (reduce cook time by 2 minutes — zucchini cooks faster), cherry tomatoes halved (add for the last 4 minutes only — they burst and create juice), or sweet potato cubes (add 3 to 4 minutes — sweet potato is denser and needs more time).
Add extras: A handful of sliced mushrooms cooks beautifully alongside the chicken and adds an earthy depth. A few chunks of red onion caramelize and sweeten. Snap peas added for the last 3 minutes stay bright green and crunchy.
Protein Variations
Chicken thighs instead of breast: Thigh meat is darker, fattier, and more forgiving if you slightly overcook it. Cut into the same one-inch cubes. Cook time stays the same. The flavor is richer and more savory than breast meat.
Shrimp: Use peeled, deveined large shrimp. Add them to the basket for the last 5 to 6 minutes of cooking only — they cook much faster than chicken and will become rubbery if added at the start. The vegetables go in first, then the shrimp joins halfway through.
Tofu: Use extra-firm tofu, pressed dry and cut into cubes. Toss with the oil and seasoning plus a teaspoon of cornstarch for extra crispiness. Cook time stays the same. The cornstarch creates a thin crunchy shell that holds up surprisingly well.
Salmon: Cut a salmon fillet into one-inch cubes. Add to the basket for the last 6 to 7 minutes. Salmon cooks faster than chicken and is done when it flakes easily with a fork. A squeeze of lemon and a sprinkle of dill on top makes this feel like a completely different meal.
Frequently Asked Questions
Do I need to preheat the air fryer?
For this recipe, preheating is optional but recommended. Three minutes at 200 degrees Celsius before loading the basket means the chicken starts searing immediately instead of slowly warming up. If you skip preheating, add one to two minutes to the cook time.
Can I use frozen chicken?
No. Frozen chicken releases a large amount of moisture as it thaws during cooking, which will steam everything in the basket instead of roasting it. Always thaw chicken completely and pat dry before using this recipe.
Can I use frozen vegetables?
Frozen broccoli works in a pinch but will not get the same charred crispy edges as fresh. Frozen vegetables carry extra ice crystals that create steam. If using frozen, spread them on a paper towel first and let them thaw for ten minutes, then pat dry before cooking.
Why is my chicken dry?
Three common causes: the cubes were too small (cut them to a full inch), the cook time was too long (check at 10 minutes), or the chicken breast was very lean with no moisture to begin with. Using thigh meat instead of breast eliminates this problem entirely because of the higher fat content.
Can I add a marinade?
Yes, but pat the chicken dry after marinating and before cooking. Excess marinade liquid in the basket will create steam and prevent browning. Marinate for 30 minutes to 2 hours in the refrigerator for the best flavor penetration without making the surface too wet.
What air fryer size do I need?
A 3.5 to 4 liter air fryer handles this recipe comfortably for one serving. For two servings, you need a 5 to 6 liter model or plan to cook in two batches. The single most important thing is that the food sits in one loose layer — cramming a double batch into a small basket will ruin the results.
How do I store and reheat leftovers?
Store in an airtight container in the refrigerator for up to 4 days. Reheat in the air fryer at 180 degrees Celsius for 3 to 4 minutes. The chicken and vegetables re-crisp almost as well as fresh. Avoid the microwave if possible — it will make everything soft and soggy.
Final Thoughts
This is not a special occasion recipe. This is a Tuesday night recipe. A Wednesday lunch recipe. A Sunday meal-prep recipe. It is the meal you make when you want to eat well without spending your evening in the kitchen, and it is the meal you keep coming back to because it genuinely tastes better than it has any right to for the effort involved.
Twenty minutes. One basket. Crispy chicken, charred broccoli, sweet roasted peppers, and garlic chips that shatter in your mouth. No skill required. No experience needed. Just an air fryer and the willingness to eat something excellent.